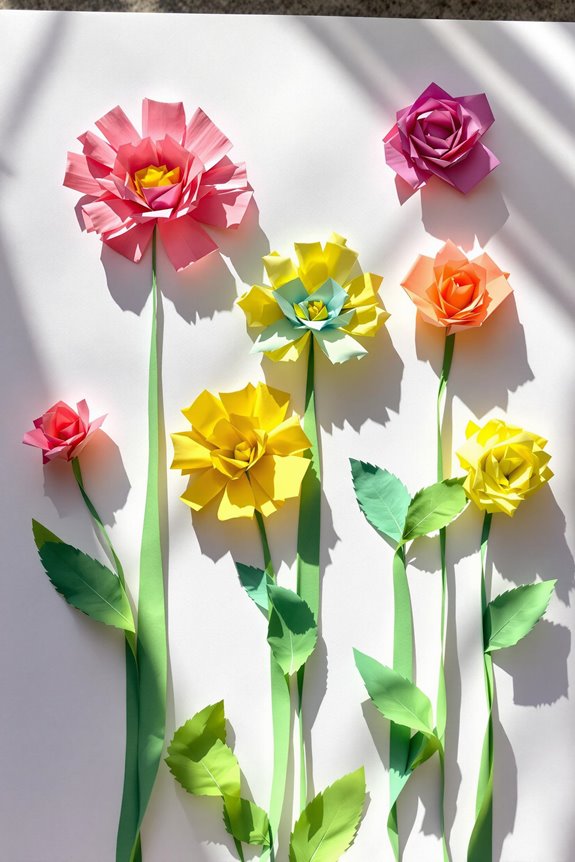
With this creative craft activity, you can transform sticky notes into a beautiful paper flower garden.
This hands-on project is excellent for teaching toddlers about flowers while helping them develop fine motor skills and creativity.
Materials Needed
- Sticky notes (various colours)
- Scissors
- Green paper or cardstock for stems and leaves
- Optional: coloured cardstock, painted paper, or templates for petal shapes
Step 1: Prepare the Workspace
Set up a clean workspace with all the materials ready. Arrange sticky notes and optional cardstock in various colours to create vibrant flowers.
Step 2: Create Petal Shapes
Fold the sticky notes in half or quarters to cut out petal shapes. If you prefer consistent petal sizes, use a template or let your toddler create their designs for a unique touch.
Step 3: Assemble the Flowers
Arrange the petals in circular patterns to form the flower. Use the sticky side of the notes to secure the petals together. If needed, add a small dot of glue for extra hold. Repeat this step to create multiple flowers.
Step 4: Add Stems and Leaves
Cut green paper or cardstock into thin strips for stems and small shapes for leaves. Attach the stems to the back of the flowers and add leaves for a realistic look.
Step 5: Mix Colours for Vibrancy
Use a mix of coloured sticky notes, painted paper, or cardstock to create a vibrant and diverse garden. Encourage your toddler to experiment with different colour combinations.
Step 6: Let It Dry
Using glue or painted paper, allow the flowers to dry completely before handling or displaying them.
Step 7: Display the Flower Garden
Once the flowers are ready, arrange them into a paper garden. You can stick them to a wall, mount them on a board, or display them in a vase.