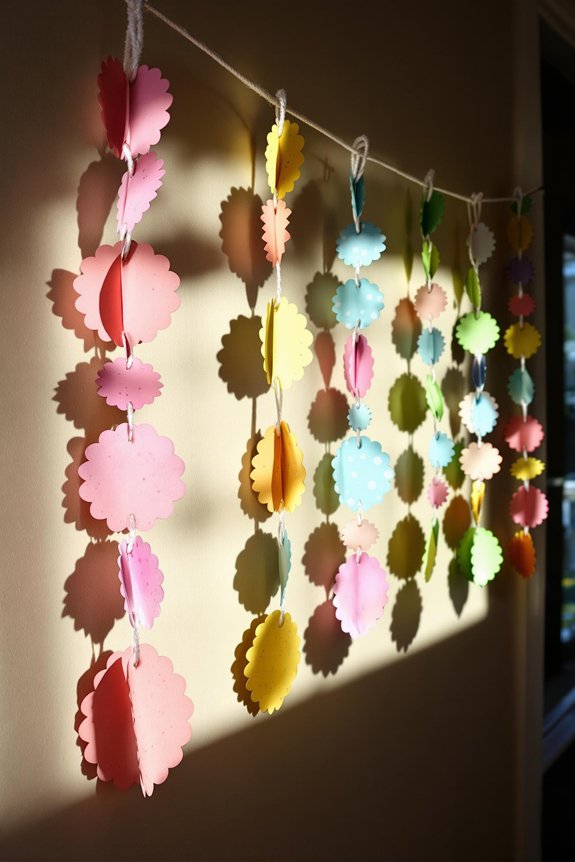
This simple egg-shaped paper chain craft creates a festive Easter garland. This easy, toddler-friendly activity helps develop fine motor skills while adding a playful and colourful touch to your spring celebrations.
Materials Needed
- Coloured construction paper or cardstock
- Scissors
- Pencil
- Ruler
- Stickers, markers, or crayons (for decorating)
- Glue stick or child-safe glue
- Optional: Pre-cut egg shapes or contact paper (for a simplified version)
Step 1: Prepare the Paper Strips
- Cut long strips of coloured paper 2-3 inches wide and at least 12 inches long.
- Fold the strip accordion-style into sections, making sure each section is slightly wider than your egg template.
Step 2: Trace and Cut the Egg Shapes
- Lightly trace an egg shape onto the top of the folded paper.
- Ensure the sides of the egg extend slightly beyond the folds so the eggs stay connected when cut.
- Carefully cut out the egg shape, making sure not to cut through the side folds.
Step 3: Unfold to Reveal the Chain
- Gently open the folded paper to reveal a continuous chain of connected Easter eggs.
- If any eggs separate, use a tiny dab of glue to reconnect them.
Step 4: Decorate the Eggs
- Let your toddler colour, draw, or add stickers to each egg.
- Use markers, crayons, or pre-cut paper shapes to create unique designs.
- For an added touch, use glitter glue or washi tape for extra sparkle.
Step 5: Display the Paper Chain
- Tape or tie the chain along a wall, mantel, or window for a festive Easter decoration.
- Create multiple chains in different colours and attach them together for a longer garland.
Bonus Variations
- Simplified Version: Use pre-cut egg shapes and contact paper, letting toddlers stick them together in a chain.
- Personalised Egg Names: Write each family member’s name on a different egg for a custom Easter banner.
- Glow-in-the-Dark Eggs: Use glow-in-the-dark stickers or paint for an exciting nighttime display.