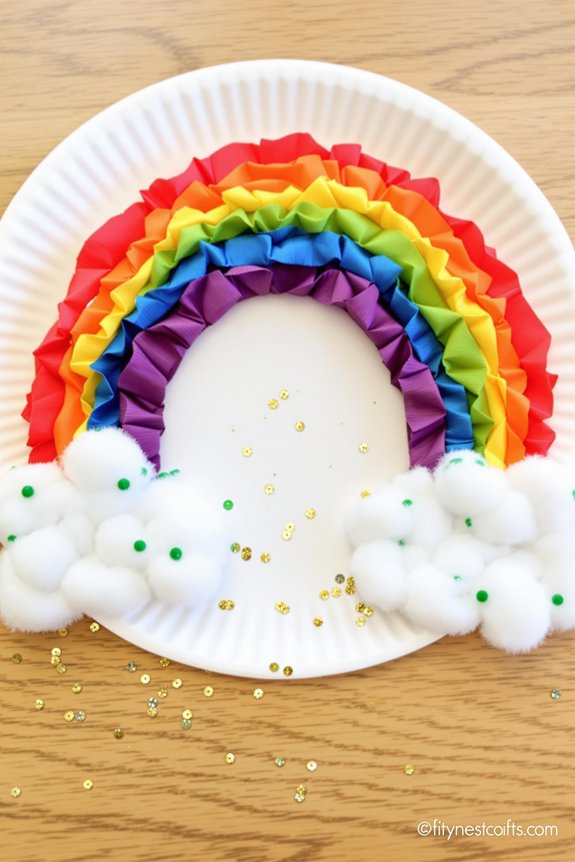
Creating a rainbow can be simple and fun with this easy paper plate craft. Toddlers will enjoy painting bright colours while exploring textures and patterns.
This hands-on activity also helps with fine motor skills and colour recognition. With just a few supplies, this St. Patrick’s Day-themed decoration comes together quickly.
Materials Needed
- Paper plate
- Red, orange, yellow, green, blue, and purple paint
- Paintbrushes
- Cotton balls (optional)
- Glue
- Scissors
- Green construction paper (optional)
- String and blue paper (optional for raindrops)
Step 1: Cut the Paper Plate
Cut a paper plate in half to create the base of the rainbow. Set one half aside for another craft or use it to test paint colours.
Step 2: Paint the Rainbow Stripes
Starting at the outer edge, paint a red stripe, followed by orange, yellow, green, blue, and purple. Use a separate brush for each colour or rinse between colours to keep the shades vibrant. Allow the paint to dry completely.
Step 3: Add Cotton Clouds or Shamrocks
Glue cotton balls along the bottom edges of the rainbow to create fluffy clouds. Cut shamrocks out of green construction paper and attach them near the base for a festive touch.
Step 4: Attach Hanging Raindrops (Optional)
For an extra effect, cut raindrop shapes from blue paper. Glue them to pieces of string and attach them to the bottom of the rainbow.
Step 5: Display the Artwork
Once the craft is dry, you can hang it on a wall, fridge, or windowsill for a cheerful St. Patrick’s Day decoration. It can also be a colourful learning tool for teaching colours and weather.