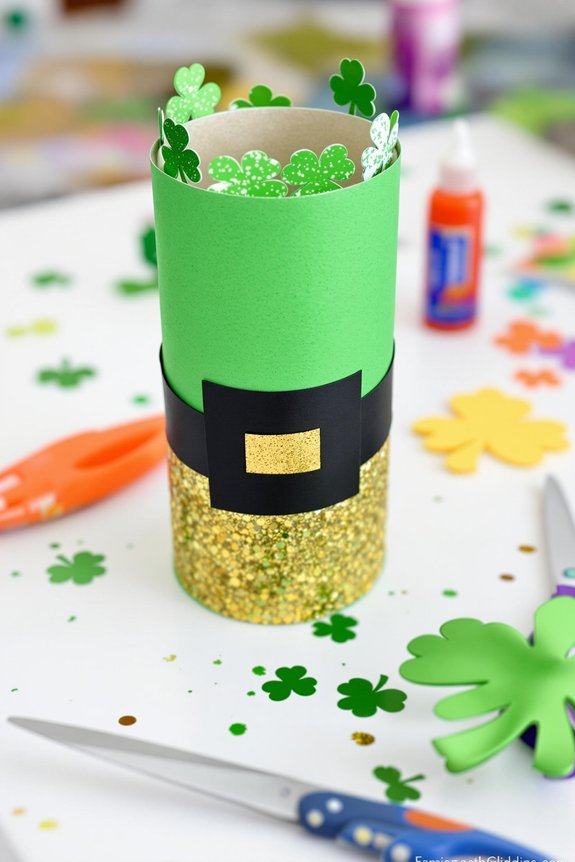
This simple craft turns an everyday toilet paper roll into a festive leprechaun hat, perfect for St. Patrick’s Day decorations.
Using basic materials, toddlers can explore colours, shapes, and textures while creating their own mini hats.
Materials Needed
Step 1: Paint the Toilet Paper Roll
Cover the entire toilet paper roll with green paint. Allow it to dry completely before moving to the next step.
Step 2: Cut Out the Hat Pieces
While the paint dries, cut out a large green circle from construction paper to serve as the hat’s brim. Cut a black strip to form the hatband and a small yellow rectangle for the buckle.
Step 3: Attach the Hatband and Buckle
Glue the black strip around the bottom of the painted toilet paper roll. Then, place the yellow rectangle in the centre of the black strip to create the buckle.
Step 4: Secure the Hat to the Base
Glue the decorated toilet paper roll to the centre of the green circle to form the base of the leprechaun hat. Press firmly and let it dry.
Step 5: Display the Leprechaun Hat
Once dry, place the hat on a table, shelf, or windowsill as a festive decoration. It can also be used as a fun party favour or a small holder for treats.